Cutting a perfect off the shoulder top at home is entirely achievable — provided you choose the right fabric, take accurate measurements, and apply the correct cutting and sewing techniques. This guide walks through every step, from material selection to finishing touches, so the result fits cleanly and holds its shape wear after wear.
A garment that exposes the shoulders and collarbone is one of fashion's most flattering silhouettes. But the difference between a polished off the shoulder top and a shapeless piece of fabric that keeps sliding down comes down to construction. Most tutorials gloss over the technical decisions that actually matter: fabric weight, elastic tension, neckline curve geometry. This guide doesn't.
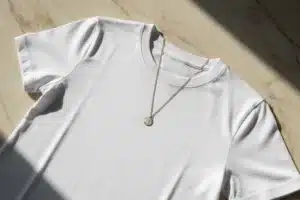
Whether you're repurposing an existing piece — the way you'd transform a basic tee into something new — or starting from scratch with fresh yardage, the process follows the same logic. Get the fundamentals right, and the styling takes care of itself.
Step 1: Choose the right fabric for an off the shoulder top
Fabric selection is where most DIY projects fail before a single cut is made. An off the shoulder top puts specific mechanical demands on the material: it must hold elastic tension at the neckline without puckering, drape cleanly across the chest, and recover its shape after stretching over the shoulders.
Fabrics that work — and why
Jersey knit (particularly cotton-spandex blends with at least 4% elastane) is the most forgiving choice for beginners. It stretches in both directions, which means the neckline elastic has room to work without distorting the fabric grain. The top stays in place because the fabric moves with the body rather than against it.
Rayon challis is the better option for a more structured, flowy aesthetic. It has a natural drape and a soft hand feel, but it doesn't stretch — so the construction needs to compensate with a wider elastic channel and precise seam allowances.
Broderie anglaise (eyelet cotton) adds texture and visual interest without adding weight. It works particularly well for summer versions of the épaule dénudée style, where lightness matters as much as coverage.
Fabrics to avoid: stiff canvas, heavy denim, or any non-woven interfacing as a primary fabric. These don't accommodate the shoulder-to-neckline curve and will create bunching at the front and back seams.
Before cutting, always pre-wash your fabric. Cotton and rayon can shrink by up to 5% on the first wash. Pre-washing eliminates that risk and also softens the hand feel, making it easier to work with.
How much fabric you'll need
For a standard cropped off the shoulder top (ending at the natural waist), plan for 1 to 1.5 meters of fabric at 140–150 cm width. If you're adding sleeves, ruffles, or a longer hem, add 0.5 meters to that estimate. Buy a small test swatch first if you're working with an unfamiliar material — sewing through it once tells you more than any product description.
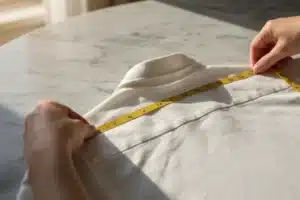
Step 2: Take precise measurements before cutting
Imprecise measurements are the single most common reason a haut dénudé ends up unwearable. The off the shoulder silhouette is less forgiving than a standard crew neck because the neckline has no structural anchor at the shoulders — it relies entirely on fit and elastic to stay in position.
The five measurements that matter
Take all measurements directly on the body, wearing only a bralette or bandeau (the undergarment you plan to wear with the finished top).
- Bust circumference — Measure at the fullest point of the chest, keeping the tape parallel to the floor.
- Upper bust / neckline circumference — Measure just below the armpits, across the front and back. This is the measurement your elastic channel will be sized against.
- Front bodice length — From the desired neckline position (typically 2–3 cm below the collarbone) down to where you want the hem.
- Back bodice length — From the same neckline height at the back down to the hem. This is often slightly longer than the front measurement.
- Shoulder width — From shoulder point to shoulder point across the back. This helps you calculate how far the neckline drops on each side.
Write every number down before touching your fabric. Add a 1.5 cm seam allowance to all edges except the hem, where 2.5 cm gives you more flexibility when adjusting the final length.
Never measure over bulky clothing. Even a thick t-shirt can add 2–3 cm to your bust measurement, which translates to a noticeably loose fit in the finished garment.
Drafting the neckline curve
The neckline curve is the most technically demanding part of the pattern. It needs to be wide enough to sit off the shoulders, deep enough to expose the collarbone, but not so deep that the elastic can't hold it in place.
Draw the curve on pattern paper using a flexible ruler or French curve. The front neckline typically drops 8–12 cm below the shoulder line. The back neckline sits higher — usually 4–6 cm below the shoulder line — to prevent the top from sliding forward during wear. Getting this asymmetry right is what separates a well-constructed top épaule dénudée from one that constantly needs adjusting.
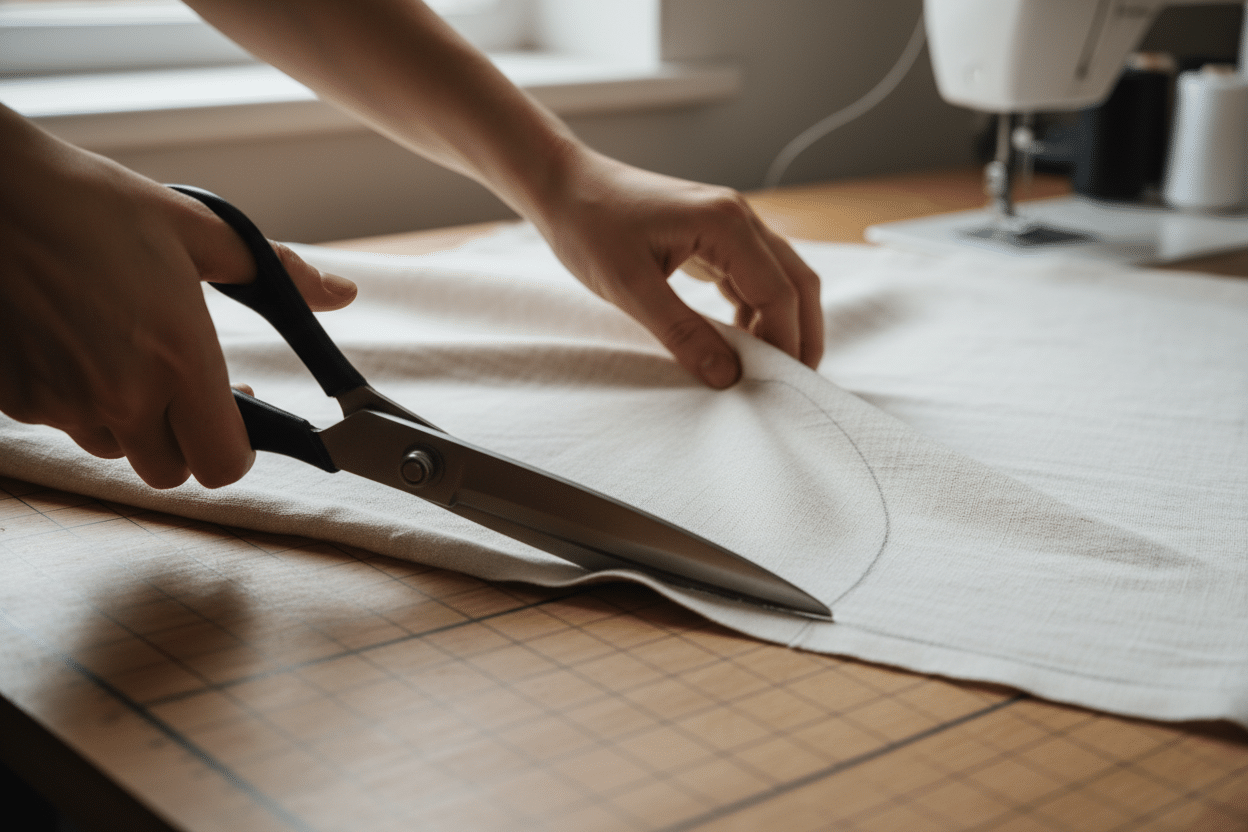
Step 3: Cutting and sewing techniques for a clean result
With the pattern drafted and the fabric pre-washed, the actual cutting and couture de vêtements begins. Precision here directly determines the quality of the finished piece.
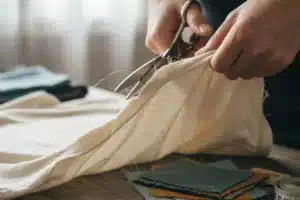
Cutting the fabric correctly
Fold the fabric in half along the selvage (the finished edge), right sides together. Pin the pattern pieces in place, aligning the center front and center back with the fabric fold — this ensures perfect symmetry without having to cut two separate pieces and match them.
Use sharp fabric scissors or a rotary cutter with a cutting mat. Dull scissors drag the fabric and distort the cut edge, which creates uneven seam allowances. Cut slowly around the neckline curve — rushing this section is how you end up with a jagged edge that no amount of sewing will fix.
Transfer all notches and markings to the fabric with a tailor's chalk or water-soluble marker before removing the pattern. These marks are your reference points during assembly.
Sewing the seams and elastic channel
Sew the side seams first, right sides together, using a straight stitch at 1.5 cm from the edge. If you're working with a stretch fabric like jersey, switch to a narrow zigzag stitch (1.5 mm width, 2.5 mm length) to allow the seam to stretch without breaking.
Press the seams open with an iron. This step is skipped constantly in mode DIY tutorials and it shows — flat, pressed seams are the difference between a handmade look and a professional one.
For the elastic channel at the neckline, fold the fabric over twice — first 1 cm, then enough to accommodate your elastic width plus 2 mm of ease. A 1.5 cm wide braided elastic works well for most off the shoulder tops. Sew the channel closed, leaving a 3 cm opening to thread the elastic through.
Cut the elastic to your upper bust measurement minus 5–8 cm (the exact reduction depends on how snug you want the fit). Thread it through the channel, overlap the ends by 2 cm, and stitch them together securely. Close the channel opening. The neckline should gather evenly when you distribute the fabric along the elastic — if it bunches in one spot, the seam allowances inside the channel are catching. Open the channel and trim them down.
Step 4: Personalize your design
A basic off the shoulder top is a blank canvas. The construction is the same whether the result is a minimalist crop or an embellished statement piece. This is where the tissu pour tops you chose and your personal aesthetic converge.
Ruffle and sleeve variations
Adding a ruffle to the neckline edge is one of the most effective ways to elevate the silhouette without adding complexity to the construction. Cut a strip of fabric twice the length of the neckline circumference and 8–12 cm wide. Gather it to match the neckline length, then sew it into the elastic channel before closing it. The ruffle sits on top of the shoulder line and frames the neckline.
For a puff sleeve version, cut two rectangular pieces scaled to your arm circumference, gather both long edges, and attach them to the side seams at underarm level. This works particularly well with stiff cotton or broderie anglaise, which holds the gathered volume without collapsing.
Embellishments and surface details
Embroidery, fabric paint, and appliqué all work on a finished off the shoulder top. If you're adding hand embroidery, do it on the fabric panel before sewing the garment together — working on a flat piece is far easier than navigating a finished seam. The same logic applies to screen printing or block printing: flat fabric, then construction.
For a more structural approach, consider boning in the side seams. A single length of spiral steel boning (or even a firm plastic alternative) sewn into each side seam keeps the bodice from rolling inward and gives the top a more structured, strapless-adjacent silhouette. This technique is borrowed directly from corsetry and works particularly well with woven fabrics that don't have stretch. Just as repurposing old garments for projects like a t-shirt quilt demands attention to fabric behavior, structural additions like boning require understanding how your chosen material responds to tension.
- Keeps the bodice upright without straps
- Reduces reliance on tight elastic alone
- Gives a more polished, tailored appearance
- Adds construction complexity
- Reduces comfort in hot weather
- Not compatible with stretch fabrics
Step 5: Care and maintenance to preserve the top
A well-constructed off the shoulder top can last years if the care routine matches the fabric. The elastic channel is the most vulnerable element — heat and rough handling degrade elastic faster than anything else.
Washing and drying
Machine washing is fine for cotton and cotton-blend jersey, but use a cold water cycle (30°C maximum) and a mesh laundry bag. The bag prevents the neckline from catching on other garments and stretching the elastic channel out of shape. Turn the top inside out before washing to protect any embellishments or printed surfaces.
Rayon and challis tops should be hand washed in cool water with a gentle detergent. Rayon loses significant structural integrity when agitated in a machine — it can shrink, stretch unevenly, or develop a rough texture that no amount of ironing will fully correct.
Never tumble dry a top with an elastic neckline. Heat causes elastic to lose its tension permanently. Air dry flat, reshaping the neckline by hand while the fabric is still damp. This takes two minutes and extends the garment's lifespan considerably.
Ironing and storage
Iron cotton versions on a medium heat setting, always on the reverse side. For rayon, use a pressing cloth between the iron and the fabric to prevent shine marks. Avoid ironing directly over the elastic channel — the heat will degrade the elastic even if it doesn't visibly damage the fabric.
Store the top folded rather than hung. Hanging an off the shoulder top by its neckline stretches the elastic channel over time, particularly with heavier fabrics. A flat drawer or shelf keeps the shape intact between wears. Understanding the construction logic behind garments — why certain cuts and names exist — is part of caring for them intelligently. The off the shoulder top is a garment that rewards attention: build it right, maintain it properly, and it holds its silhouette season after season.