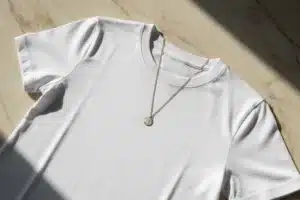
Turning a T-shirt into a tank top takes less than 30 minutes and costs nothing if you already own a pair of scissors. It's one of the most effective upcycling moves in DIY fashion — no sewing machine required, no special skills needed. The result is a custom piece that fits your style, reduces textile waste, and actually looks intentional.
You probably have at least one T-shirt sitting in your closet that you never wear. Maybe the fit is off, the neckline is wrong, or it just feels dated. Before donating it or tossing it out, consider what it could become. T-shirt to tank top transformation is one of those rare DIY projects where the barrier to entry is almost zero, but the creative ceiling is surprisingly high. A basic cotton tee can become a cropped muscle tank, a flowy open-back top, or a festival-ready piece with lace inserts — depending on how far you want to take it.
This guide covers the full process: what you need, how to cut, how to finish the edges, and how to make the result look deliberate rather than accidental.
Step 1: Gather the right materials
The beauty of this project is that you don't need much. But the quality of your tools directly affects the quality of your result. A clean cut with sharp scissors looks intentional. A jagged cut with dull scissors looks like an accident.
Essential tools for a clean T-shirt transformation
- Sharp fabric scissors (not kitchen scissors — the difference is significant)
- Tailor's chalk or a washable fabric marker for marking cut lines
- A ruler or measuring tape to keep lines straight
- Straight pins if you plan to fold and hem edges
- A flat work surface — a table or the floor, not your lap
That's genuinely all you need for a no-sew version. If you want cleaner, more durable edges, add a needle and thread or a sewing machine to the list. Iron-on hemming tape is a strong middle-ground option — it bonds fabric edges with heat and holds through multiple washes.
Choosing the right T-shirt
Not every tee transforms equally well. 100% cotton fabric is the most forgiving: it cuts cleanly, doesn't fray as aggressively as synthetic blends, and has a natural drape that works well for tank tops. Heavier cotton (180-200 GSM) holds structure better. Thinner jersey knit will drape more and fray faster, which can actually be a stylistic choice if you want that raw, worn-in aesthetic.
Oversized T-shirts are particularly good candidates. The extra fabric gives you more room to work with, and the resulting tank top tends to have a more relaxed, contemporary silhouette.
Wash and dry your T-shirt before cutting. Fabric can shrink slightly after the first wash, and you want to cut the final shape — not a pre-shrink version of it.
Step 2: Mark and cut the T-shirt into a tank top shape
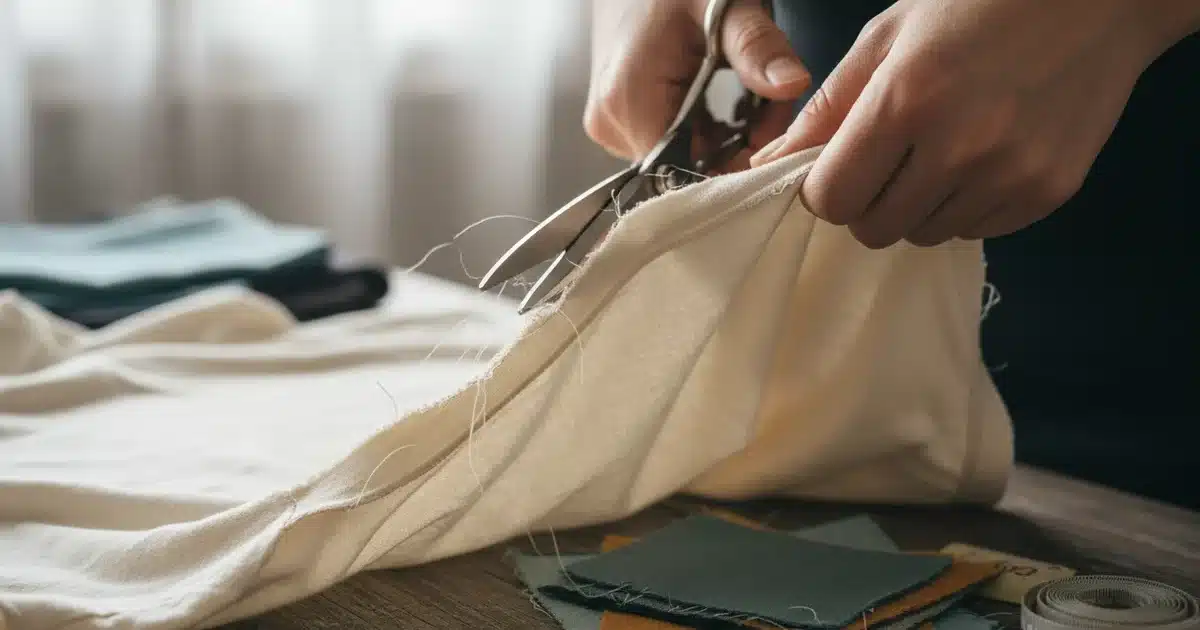
This is where most people rush and regret it. Take five minutes to mark your lines before you cut anything. You cannot un-cut fabric.
How to mark the shoulder and armhole cuts
Lay the T-shirt flat on your work surface. Smooth out any wrinkles. The goal is to remove the sleeves and reshape the neckline and armholes to create a tank top silhouette.
Start by marking the shoulder width you want to keep. A standard tank top leaves roughly 2 to 3 cm of shoulder strap on each side. Use your fabric marker to draw a curved line from the neckline down to the underarm area on both sides. The curve should mirror the natural shape of a tank top — not a straight diagonal cut, but a gentle arc that follows the body's contour.
For the neckline, decide whether you want to keep it as-is or widen/deepen it. A wider scoop neck gives a more feminine look. A deeper V-neck creates a different effect entirely. Mark whatever shape appeals to you before cutting.
Cutting technique for clean edges
Cut along your marked lines slowly and deliberately. Keep the fabric flat and use the full length of your scissors blades — short snipping motions create uneven edges. Cut through both layers of fabric simultaneously so the front and back match.
Cut slightly outside your marked line on the first pass. You can always remove more fabric — you cannot add it back. Try the top on before making any additional cuts.
Once the sleeves are removed and the armholes are shaped, try the top on and assess. Adjust the depth or width of the armholes if needed. This is also when you decide whether to cut the hem shorter for a cropped effect.
Step 3: Finish the edges for a polished result
Raw edges on a DIY tank top are a design choice, not a flaw — but only if they're consistent and intentional. Uneven fraying looks unfinished. Even fraying looks deliberate.
No-sew edge finishing options
The simplest approach: leave the edges raw. Cotton jersey knit curls slightly when cut, which actually creates a natural, clean-looking border on its own. If you want this look, make sure your cuts are smooth and even.
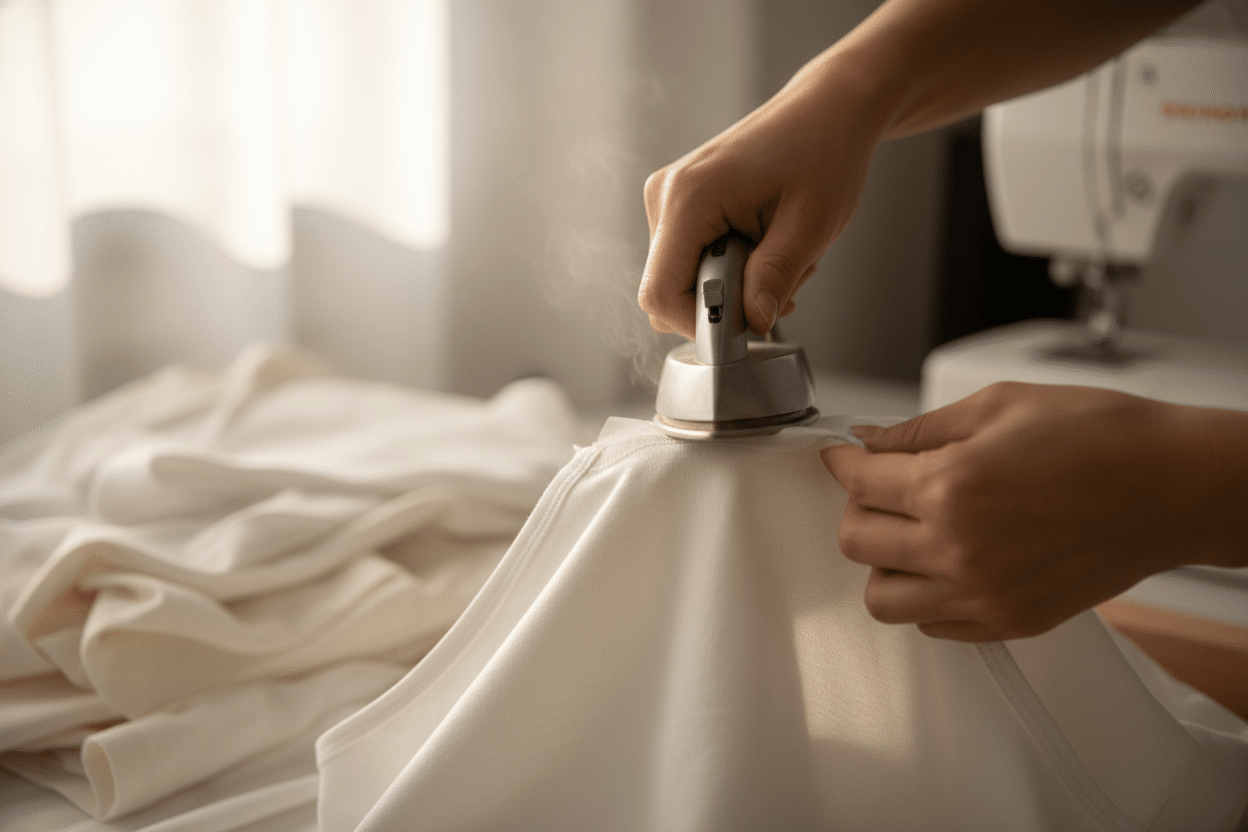
For a slightly more finished look without sewing, fold the raw edge over by about 1 cm and secure it with iron-on hemming tape. Run a warm iron along the fold and it bonds permanently. This works particularly well on the shoulder straps and neckline where the fabric is most visible.
Sewing the edges for durability
If you have access to a sewing machine, a simple zigzag stitch along the raw edges prevents fraying and adds longevity to the piece. Set the machine to a medium-width zigzag and stitch close to the edge. This is especially worth doing if the T-shirt fabric is thin or loosely woven.
Hand-stitching a basic hem also works. Use a slip stitch or a whip stitch with thread that matches the fabric color. It takes about 20 minutes per armhole but the result is clean and professional.
- Fast and zero-effort
- Casual, intentional aesthetic
- Works well on cotton jersey
- No tools required beyond scissors
- Can fray unevenly over time
- Less durable through repeated washing
- Not ideal for synthetic or loose-weave fabrics
Step 4: Personalize and style your homemade tank top
A plain cut is just the starting point. Mode DIY at its best means making a piece that looks like it was designed for you specifically — not just a T-shirt with the sleeves removed.
Customization techniques that actually work
Tie-dye and bleach effects are the most accessible options. Bleach splatter on a dark cotton tank creates a striking, high-contrast pattern that requires nothing more than diluted bleach, rubber gloves, and a spray bottle. Tie-dye using cold-water fiber reactive dyes gives more controlled color results.
Lace inserts elevate the piece significantly. Cut a panel out of the back or side of the tank and sew in a strip of lace fabric. This works especially well on oversized tanks that have extra fabric to work with. The contrast between a casual cotton base and a delicate lace insert is a classic mode durable aesthetic.
Embroidery is slower but the results are personal and genuinely unique. Simple running stitches along the neckline or a small motif on the chest can transform a basic tank into something that looks intentionally crafted. You don't need advanced embroidery skills — basic geometric patterns or botanical shapes work well for beginners.
Fringe cutting along the hem is another option: make vertical cuts of equal length and spacing along the bottom edge to create a fringed hem. It works best on longer tanks where there's enough fabric below the waist.
Styling the finished tank top
A well-cut tank top is one of the most versatile pieces in a wardrobe. Wear it tucked into high-waisted trousers for a clean, minimal look. Layer it under an open button-down shirt for a casual summer outfit. Pair a cropped version with wide-leg pants for a balanced silhouette. For a more editorial approach, layer multiple tanks of different lengths for a tonal, textured effect.
The key is treating the piece as a real garment, not a craft project. Style it with the same intentionality you'd apply to anything else in your wardrobe.
Step 5: Care for your upcycled tank top properly
A débardeur fait maison deserves the same care as any other garment — arguably more, since it's a one-of-a-kind piece.
Washing and drying guidelines
Turn the tank inside out before washing. This protects any surface treatments (bleach patterns, embroidery, lace inserts) from friction in the machine. Wash on a cold, gentle cycle — hot water causes cotton to shrink and can loosen iron-on hemming tape.
Avoid the dryer if possible. Air-dry the tank flat or on a hanger to preserve its shape. High heat in a dryer degrades cotton fibers faster and can cause the raw edges to fray more aggressively.
If you've added lace inserts or embroidery, hand-washing is the safest option. Use a mild detergent, soak for a few minutes, rinse thoroughly, and press out excess water without wringing.
Maintaining the edges over time
Raw edges will continue to fray slightly with each wash — this is normal and, on cotton jersey, usually stabilizes after a few washes. If the fraying becomes excessive, trim the edges with sharp scissors to even them out. A small amount of fabric glue applied to the very edge of a fraying seam can stop it from progressing further without changing the appearance of the garment.
Store the tank folded rather than on a hanger if the shoulder straps are very narrow. Thin straps can stretch out over time under their own weight, especially on heavier cotton fabric. With basic care, a well-made upcycled tank top lasts just as long as any store-bought piece — and it fits better, because you made it to your own measurements.