A t-shirt quilt transforms worn-out or outgrown shirts into a meaningful textile keepsake. With the right preparation, basic sewing skills, and a clear method, you can complete this project in a weekend. This guide covers everything from selecting your shirts to finishing and caring for your quilt.
There's something deeply personal about a pile of old t-shirts. A concert tee from a festival you barely remember. A college shirt that's faded but impossible to throw away. A kids' team jersey that no longer fits but still carries weight. Rather than letting these pieces collect dust in a drawer, a t-shirt quilt gives them a second life — one that's both functional and visually striking.
This isn't a beginner quilting project in the traditional sense. But it's far more accessible than most people assume. You don't need advanced sewing experience or expensive equipment. What you need is a clear process, the right materials, and a willingness to work methodically.
Step 1: Choose the right t-shirts for your quilt
The selection phase is where the project takes shape — emotionally and aesthetically. Rushing through it leads to a quilt that feels random rather than intentional.
Prioritize emotional significance over visual perfection
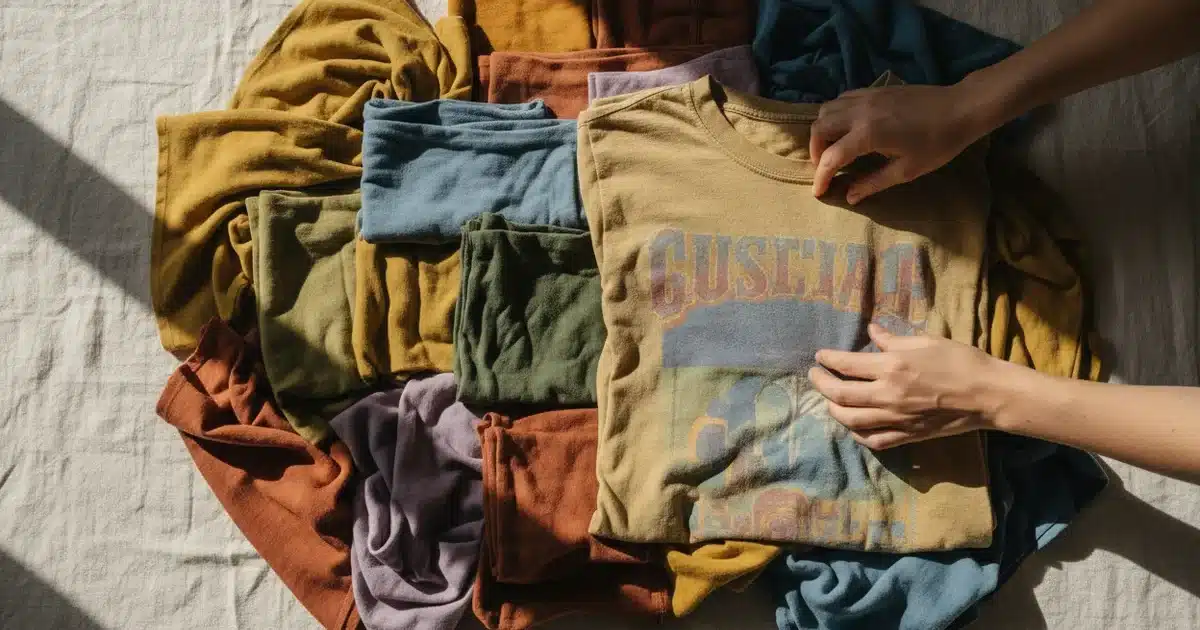
Start by pulling every t-shirt you're considering and laying them out on a flat surface. The first filter is purely emotional: which shirts actually mean something? A shirt you wore every weekend for three years carries more narrative weight than a promotional tee you picked up at a trade show. A souvenir textile from a meaningful trip, a sports jersey from a team you coached, a band shirt from a formative concert — these are the pieces that make a quilt worth keeping.
Don't force yourself to include shirts just to fill the count. A quilt made of 20 genuinely meaningful pieces is far more satisfying than one padded out to 30 with filler.
Balance colors and graphic sizes for visual cohesion
Once you've made the emotional cut, step back and look at what you have from a design perspective. Spread the shirts out and look for rough color groupings. A quilt dominated by dark navy and black shirts with one bright yellow outlier will feel off. You don't need a perfectly coordinated palette, but you do need to think about distribution.
Graphic size matters too. Large chest prints, small pocket logos, and oversized back graphics all cut differently and will affect your block sizes. Decide early whether you want uniform block sizes (simpler to assemble) or variable sizes (more dynamic but more complex to piece together). For a first project, uniform blocks are the smarter choice.
Aim for a minimum of 12 shirts for a lap quilt, 20 or more for a full or queen-size project.
If you’re short on shirts with meaningful graphics, include solid-colored panels cut from the shirt backs as filler blocks. They add breathing room between busy graphics and improve the overall visual balance.
Step 2: Prepare the t-shirts before cutting
Preparation is the step most beginners skip or rush. It's also the step that determines whether your finished quilt lies flat and holds its shape over time.
Wash and stabilize the fabric
Wash every shirt before you cut anything. T-shirt fabric — typically cotton jersey knit — shrinks, and you want that shrinkage to happen before the quilt is assembled, not after. Wash on warm and tumble dry. If the shirts have already been washed dozens of times, they're likely pre-shrunk, but do it anyway for consistency.
The bigger challenge with jersey knit is stretch. Unlike woven quilting cotton, jersey stretches in multiple directions, which makes it difficult to cut cleanly and sew accurately. The solution is fusible interfacing — a heat-activated stabilizing fabric that you iron onto the back of each shirt panel before cutting. Use a medium-weight woven interfacing, not the stretchy kind. This single step transforms floppy, stretchy jersey into a stable panel that behaves like quilting cotton.
Cut the interfacing slightly larger than your intended block size, iron it onto the wrong side of the shirt, and let it cool completely before cutting to final dimensions.
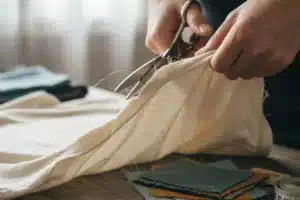
Cut your blocks with precision
Decide on your block size. 15 inches square is a versatile standard that accommodates most graphic sizes while keeping the quilt manageable. Mark your cutting lines with a fabric marker or chalk, using a quilting ruler and rotary cutter for clean, straight edges. Scissors work, but a rotary cutter on a cutting mat is significantly faster and more accurate.
Center the graphic within your block before cutting. Most shirt graphics sit slightly above center on the chest, so don't assume the center of the shirt is the center of the graphic. Measure from the graphic outward, not from the shirt edges inward.
Never skip the fusible interfacing step. Without stabilization, jersey blocks stretch and distort as you sew, creating wavy seams and a quilt that won’t lie flat. This is the most common mistake in t-shirt quilt projects, and it’s entirely preventable.
Step 3: Assemble the quilt top
With your blocks cut and stabilized, the assembly phase begins. This is where your sewing project starts to look like an actual quilt.
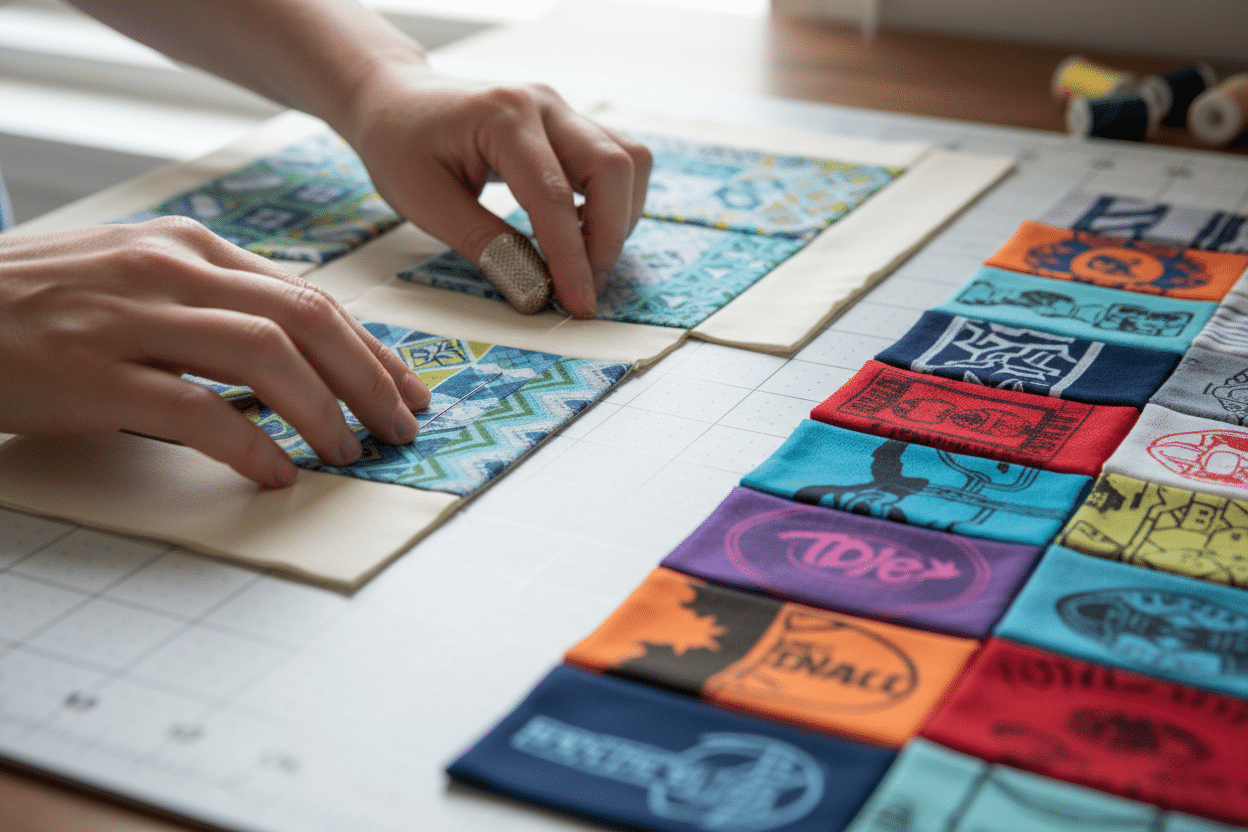
Arrange your layout before sewing a single seam
Lay all your blocks on the floor or a large table and arrange them into rows. Step back and look. Move blocks around until the color distribution feels balanced and no two visually similar shirts are adjacent. Take a photo of the final arrangement — you'll reference it constantly during sewing.
A standard lap quilt uses a 4×5 grid (20 blocks). A twin-size quilt typically requires a 5×7 or 5×8 grid. Decide your dimensions based on the number of shirts you have and the intended use of the quilt.
Sew rows, then join rows
The most efficient assembly method is to sew blocks into horizontal rows first, then join the rows together. Use a quarter-inch seam allowance throughout, pressing each seam open with an iron as you go. Pressed-open seams reduce bulk at the intersections and help the quilt lie flat.
Pin generously. Jersey-backed blocks, even stabilized ones, have more give than woven fabric. Pinning every few inches prevents drift as you feed the fabric through the machine. Use a walking foot if your machine has one — it feeds the top and bottom layers at the same rate, which is particularly helpful with thicker, stabilized panels.
When joining rows, align the seam intersections carefully. Pinning directly through the intersection points before sewing keeps the grid looking crisp rather than slightly off.
- Easier to cut and sew consistently
- Cleaner, more structured visual result
- Faster assembly process
- Better suited for first-time quilters
- Requires more complex piecing math
- Harder to align seams across rows
- Risk of visual chaos without strong design sense
- Significantly more time-consuming
Add sashing for a more polished look
Sashing — strips of fabric sewn between blocks — is optional but worth considering. A 2-inch sashing in a neutral color (grey, cream, or black) separates the graphics visually, gives each shirt its own space, and makes the quilt look more intentional. It also adds size without requiring additional shirts.
Use a quilting cotton for the sashing rather than jersey. It's easier to work with, adds structural stability to the quilt top, and contrasts nicely with the softer texture of the t-shirt panels.
Step 4: Finishing and caring for your quilt
The quilt top is done. Now it needs backing, batting, and binding to become a finished object.
Build the quilt sandwich
A quilt sandwich consists of three layers: the backing fabric on the bottom, the batting in the middle, and your t-shirt quilt top on top. Cut the backing and batting several inches larger than the quilt top on all sides to allow for adjustment during quilting.
For the backing, a soft quilting cotton or a fleece works well. Fleece has the advantage of not requiring binding — you can simply fold it over the edges — which simplifies the finishing step considerably. For batting, a medium-loft polyester or cotton-poly blend is the standard choice for t-shirt quilts. It's washable, retains its loft over time, and doesn't shift significantly inside the quilt.
Baste the three layers together using safety pins every 4 to 6 inches across the surface. Spray basting adhesive is faster but less reliable for larger quilts.
Quilt and bind the edges
For quilting — the stitching that holds the three layers together — the simplest approach is stitch-in-the-ditch quilting, which means sewing directly along the existing seam lines between blocks. It's invisible from the front, requires no marking, and secures the layers effectively. If you want more visual texture, a simple grid or diagonal lines across the entire surface also work well.
Once quilted, trim the backing and batting flush with the quilt top. Bind the edges with a 2.5-inch double-fold binding cut from quilting cotton. Sew it to the front first, fold it over to the back, and hand-stitch or machine-stitch it down. Mitered corners give a sharp, professional finish.
Care instructions for long-term durability
A well-made t-shirt quilt should last decades with proper care. Wash on a gentle cycle in cold water, and tumble dry on low. Avoid high heat — it degrades the interfacing bond over time and can cause the jersey panels to shrink unevenly. If the quilt is purely decorative, spot-clean as needed and air out periodically rather than washing the entire piece.
Store folded quilts with acid-free tissue paper between the folds to prevent permanent crease lines. If you're gifting the quilt, include a small care card — the recipient may not know that jersey-backed textiles require gentler handling than standard quilts.
The longevity of a t-shirt quilt comes down to three things: proper stabilization before cutting, careful pressing during assembly, and cold-water washing throughout its life. Get those three right, and the quilt will outlast the shirts it was made from.
The result of this process isn't just a functional blanket. It's a curated textile keepsake — a physical archive of experiences, places, and phases of life that would otherwise fade in a storage box. That's what separates a t-shirt quilt from any other sewing project: the material already carries meaning before the first stitch is made.
Recap of key steps:
- Select shirts based on emotional significance and visual balance (minimum 12 for a lap quilt)
- Wash all shirts, then apply fusible interfacing to stabilize the jersey fabric
- Cut uniform blocks (15 inches square recommended) centered on the graphic
- Arrange the layout, sew blocks into rows, then join rows with quarter-inch seams
- Build the quilt sandwich with backing, batting, and quilt top
- Quilt the layers together (stitch-in-the-ditch is simplest), then bind the edges
- Wash cold, tumble dry low, and store with acid-free tissue to preserve the quilt