A poorly fitting shirt undermines any outfit, no matter how expensive or well-chosen. Measuring a shirt correctly — across the collar, chest, shoulders, and sleeves — is the single most reliable way to guarantee a fit that flatters your frame and holds up across different brands and fabrics.
A shirt that pulls across the chest, gaps at the collar, or swallows the torso is not a style choice. It's a sizing problem. And yet, most people either rely on generic size labels or guess their measurements based on what "usually works." Neither approach is reliable. Brands cut differently, fabrics behave differently, and bodies don't conform to standardized size charts.
Knowing how to measure a shirt — both your body and the garment itself — removes the guesswork entirely. Whether you're buying off the rack, ordering online, or having something tailored, accurate measurements are the foundation of a shirt that actually works.
The basics of shirt measurement
Before pulling out a tape measure, understand what you're actually measuring. There are two distinct exercises here: measuring your body to determine the right shirt size, and measuring an existing shirt to compare against new purchases. Both matter, and they use different reference points.
Collar measurement
The collar is the most critical measurement for dress shirts. Measure around the base of your neck, keeping the tape snug but not tight. Add about 0.5 inches (1.3 cm) to that number to allow for comfortable movement and a properly knotted tie. A collar that's too tight creates visible creasing and discomfort throughout the day. Too loose, and the collar gaps awkwardly above the tie.
When measuring an existing shirt, lay it flat and measure the collar band from the center of the button to the far edge of the buttonhole.
Chest and shoulder measurement
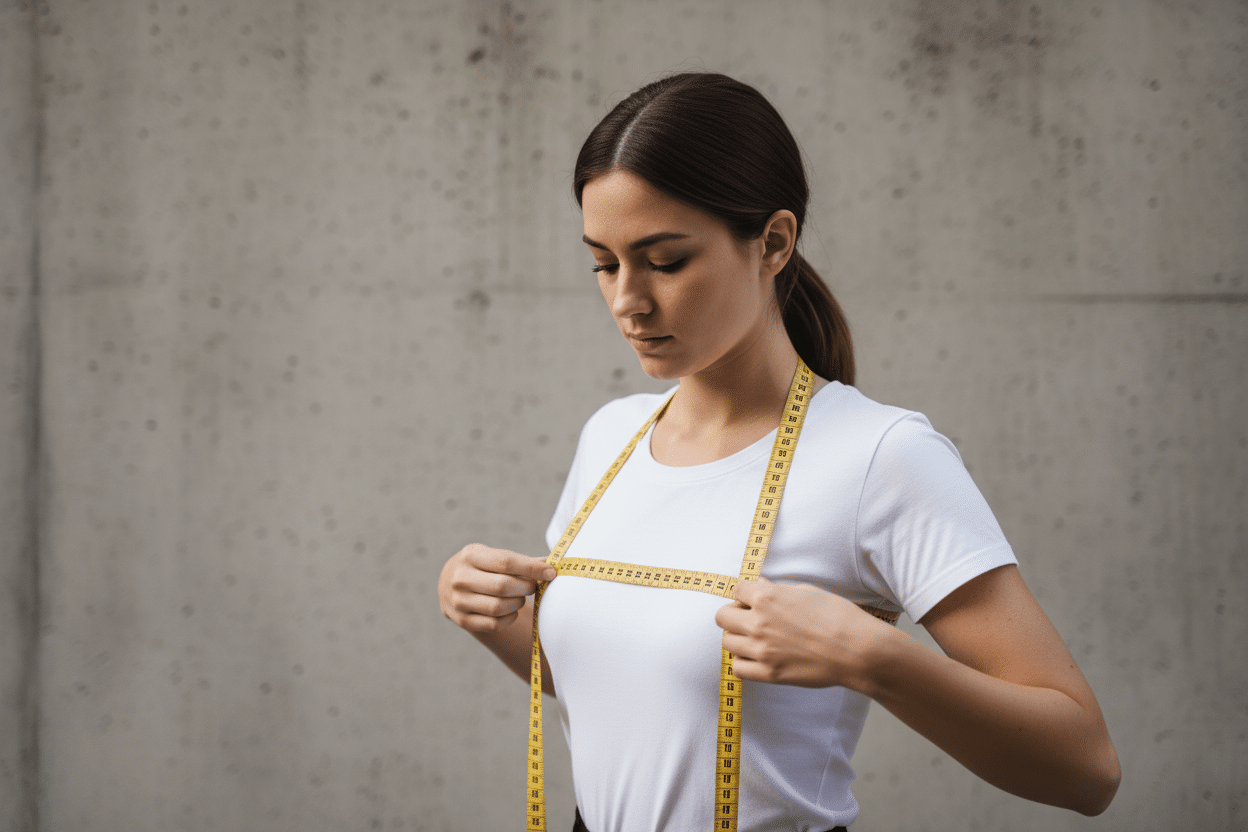
The chest measurement is taken around the fullest part of the torso, directly under the armpits, with arms relaxed at the sides. Keep the tape parallel to the floor and don't compress the chest. For a well-fitted shirt, you want roughly 2 to 3 inches (5 to 7.5 cm) of ease beyond your actual chest circumference.
Shoulders are measured from the point where the shoulder meets the arm on one side, straight across the back to the same point on the other side. This measurement is arguably the hardest to adjust in tailoring — a shoulder seam that sits too far inward or outward changes the entire silhouette. Get this one right first.
Sleeve and body length
Sleeve length is measured from the center back of the neck, over the shoulder, down to the wrist bone with a slight bend in the elbow. For body length, measure from the highest point of the shoulder down to where you want the shirt to end — typically mid-hip for a tucked shirt, or lower for casual wear.
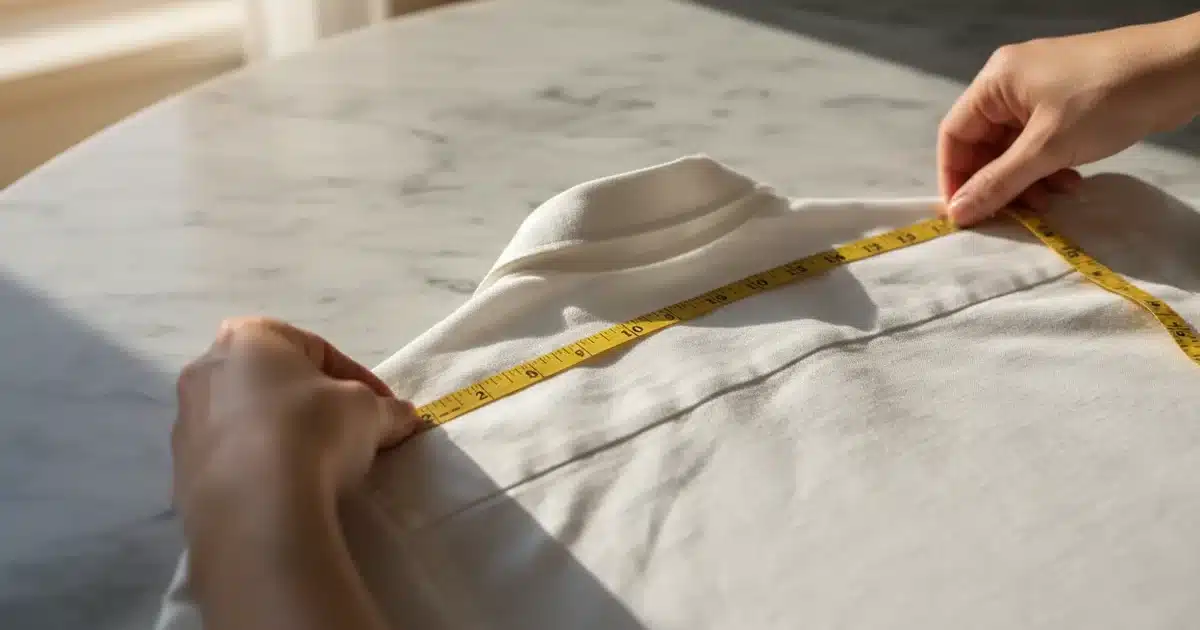
When measuring a shirt directly, lay it flat on a hard surface, smooth out any wrinkles, and measure seam to seam for the most accurate readings.
The right tools for accurate shirt measurements
Precision here doesn't require professional equipment. But using the wrong tools — or the right tools incorrectly — introduces errors that compound across multiple measurements.
The tape measure
A flexible measuring tape (the kind used in sewing, not construction) is non-negotiable. Rigid rulers and retractable metal tapes cannot follow the contours of the body accurately. A standard dressmaker's tape, 60 inches (150 cm) long, handles every measurement needed.
Keep the tape taut but not stretched. Fabric tapes can loosen over time, so if yours is more than a few years old, compare it against a ruler before trusting it for precise work.
Mirror and assistance
Measuring yourself solo introduces parallax errors — you tilt your head to read the tape, which shifts your posture and distorts the measurement. A full-length mirror helps with positioning, but a second person is genuinely better for collar, shoulder, and sleeve measurements. If you're measuring alone, take each measurement twice and average the results.
Always measure over the type of clothing you’ll actually wear under the shirt — a thin undershirt versus a thick thermal layer changes your measurements by more than you’d expect.
A reference shirt
The most practical tool is a well-fitting shirt you already own. Lay it flat and use it as a physical template. Measure its chest width, shoulder width, sleeve length, and body length, then compare those numbers directly against new purchases. This method bypasses size label inconsistencies entirely and translates your fit preferences into concrete numbers.
Common measurement mistakes and how to avoid them
Even with the right tools, certain errors appear consistently. Knowing them in advance saves the frustration of ordering a shirt that doesn't fit despite careful preparation.
Measuring over bulky clothing
Taking measurements over a heavy sweater or jacket inflates every dimension. The result is a shirt that fits the sweater, not the body. Always measure in a light layer — a fitted t-shirt or undershirt is the right baseline. If you're curious about how garments layer and interact, understanding what the T in T-shirt actually means offers some useful context on how basic garment categories are defined.
Pulling the tape too tight or too loose
Both extremes distort results. Too tight compresses the body and produces measurements that will feel constricting in a finished garment. Too loose generates excess ease that translates to a baggy, unflattering fit. The tape should lie flat against the body with just enough slack to slide a finger underneath — nothing more.
Ignoring posture
Slouching rounds the back and shortens the torso, artificially reducing measurements. Stand straight, shoulders relaxed (not forced back), feet together, and look forward. This is the posture the shirt will need to accommodate during normal wear.
Never measure a shirt while it’s still on a hanger or draped over a surface — gravity distorts fabric and throws off every dimension. Always lay the garment completely flat on a hard, level surface before measuring.
Trusting size labels across brands
A size Medium from one brand can correspond to a Large from another. European sizing, American sizing, and Asian sizing follow entirely different conventions. Measurements in inches or centimeters are the only consistent reference. Build a personal measurement chart and compare it against each brand's size guide before purchasing.
Adapting measurements to your body type
A shirt that fits a standard template may still look wrong on a specific frame. Understanding how body proportions interact with shirt dimensions is what separates a decent fit from a genuinely great one.
Broad shoulders and narrow waist
This silhouette benefits from shirts with a tapered cut — wider at the chest, narrower through the waist. When measuring, the chest and shoulder dimensions will be the primary constraints. The waist suppression in the shirt's cut does the aesthetic work. If buying off the rack, prioritize shoulder fit above all else, since shoulders cannot be adjusted without significant tailoring cost.
Longer torso or short arms
Proportional mismatches are common. Someone with a long torso and shorter arms needs a shirt with adequate body length but shorter sleeves — a combination that standard sizing rarely provides. Measuring both dimensions separately and noting the discrepancy is the first step. From there, the options are custom shirts, made-to-measure services, or strategic alterations.
Athletic build
Broader chests and shoulders with a narrower waist create a V-shape that standard shirts accommodate poorly. The chest measurement drives the size selection, which usually means excess fabric through the waist. Shirts labeled "athletic fit" or "slim fit" are cut with this proportion in mind, but the actual dimensions still need to be verified against your measurements — the label alone guarantees nothing.
If you enjoy adapting garments to better suit your proportions, the technique of transforming a t-shirt into a tank top applies similar logic about working with existing fabric to achieve a better fit.
How fabric affects shirt fit and measurement
Measurements taken on a flat garment don't fully capture how a shirt will behave on the body. Fabric composition changes the equation significantly.
Stretch versus woven fabrics
Woven fabrics — poplin, oxford cloth, linen, chambray — have no inherent stretch. A woven shirt fits exactly as its measurements suggest. There's no give, so the chest, shoulder, and collar dimensions need to be accurate. Add the standard ease (2 to 3 inches at the chest) and the fit will hold throughout the day.
Stretch fabrics incorporate elastane or spandex and can accommodate a range of body dimensions. This makes them more forgiving but also harder to measure precisely. A stretch shirt measured flat will show a chest width of, say, 20 inches — but it may comfortably fit a chest 3 or 4 inches larger. When measuring stretch shirts, note whether the brand specifies measurements flat or under tension.
Fabric weight and drape
Heavier fabrics — thick cotton twill, flannel, or structured linen — hold their shape and create a more defined silhouette. Lighter fabrics drape and move with the body, which can either flatter or expose fit issues depending on the cut. A shirt that fits well in a heavy poplin may look loose in a lightweight voile with the same dimensions, because the lighter fabric clings differently.
Shrinkage and pre-washing
Cotton shirts, particularly untreated ones, shrink with washing — often 3 to 5% in length and width after the first wash. If you're measuring a new, unwashed shirt to compare against your body measurements, factor in this shrinkage. Pre-washed or "sanforized" fabrics have already been treated to minimize this effect, but it's worth confirming in the product description before assuming the measurements will hold.
Always check whether a shirt’s listed measurements are pre- or post-wash. For untreated cotton, size up by half an inch across the chest and sleeves to account for shrinkage after the first wash cycle.
Understanding fabric behavior also matters when repurposing garments — the structural differences between woven and knit fabrics, for instance, explain why making a t-shirt quilt requires different handling than working with woven dress shirt fabric.
Getting shirt measurements right is a skill that pays dividends across every purchase, every alteration, and every outfit. The tape measure, used correctly and consistently, is a more reliable guide than any size label ever will be.